
Or how a gentle meander became a full blown storm
Until I made this quilt last year, I had stuck to
stitch-in-the-ditch and straight line quilting, but I was dying to try
out my Bernina Stitch
Regulator. This is a little device that you attach to the machine and it
basically keeps up with you when you do free motion quilting. If you
move the quilt faster, it sews faster and vice versa, so that the
stitches are much more even. I had visions of a beautiful stippled quilt, so easy and effortless the way people like Leah Day or Angela Walters make it seem. Oh how wrong I was!
I tried the quilting on a baby quilt for my younger son. This is what it looked like. It was much harder than I had expected to steer the quilt and keep the pattern even. And, of course, I used a bright red thread for it, you know, just so you can REALLY see all the spiky, uneven turns and wonky loops!

First free motion attempt - baby quilt (Sept 2013)
Below is a close-up. The stippling never really materialised, it was more of a jagged wave pattern.
Some lessons learnt:
- Practice, practice, practice before you take on a real quilt
- Don't expect perfection, embrace the mistakes
- Try and use a neutral coloured thread that blends into the background. I think this looks nicer as it does not clash with the design of the quilt (and it also means mistakes are not quite as obvious!)
- Check out online resources for some help (Leah Day has lots of youtube videos)
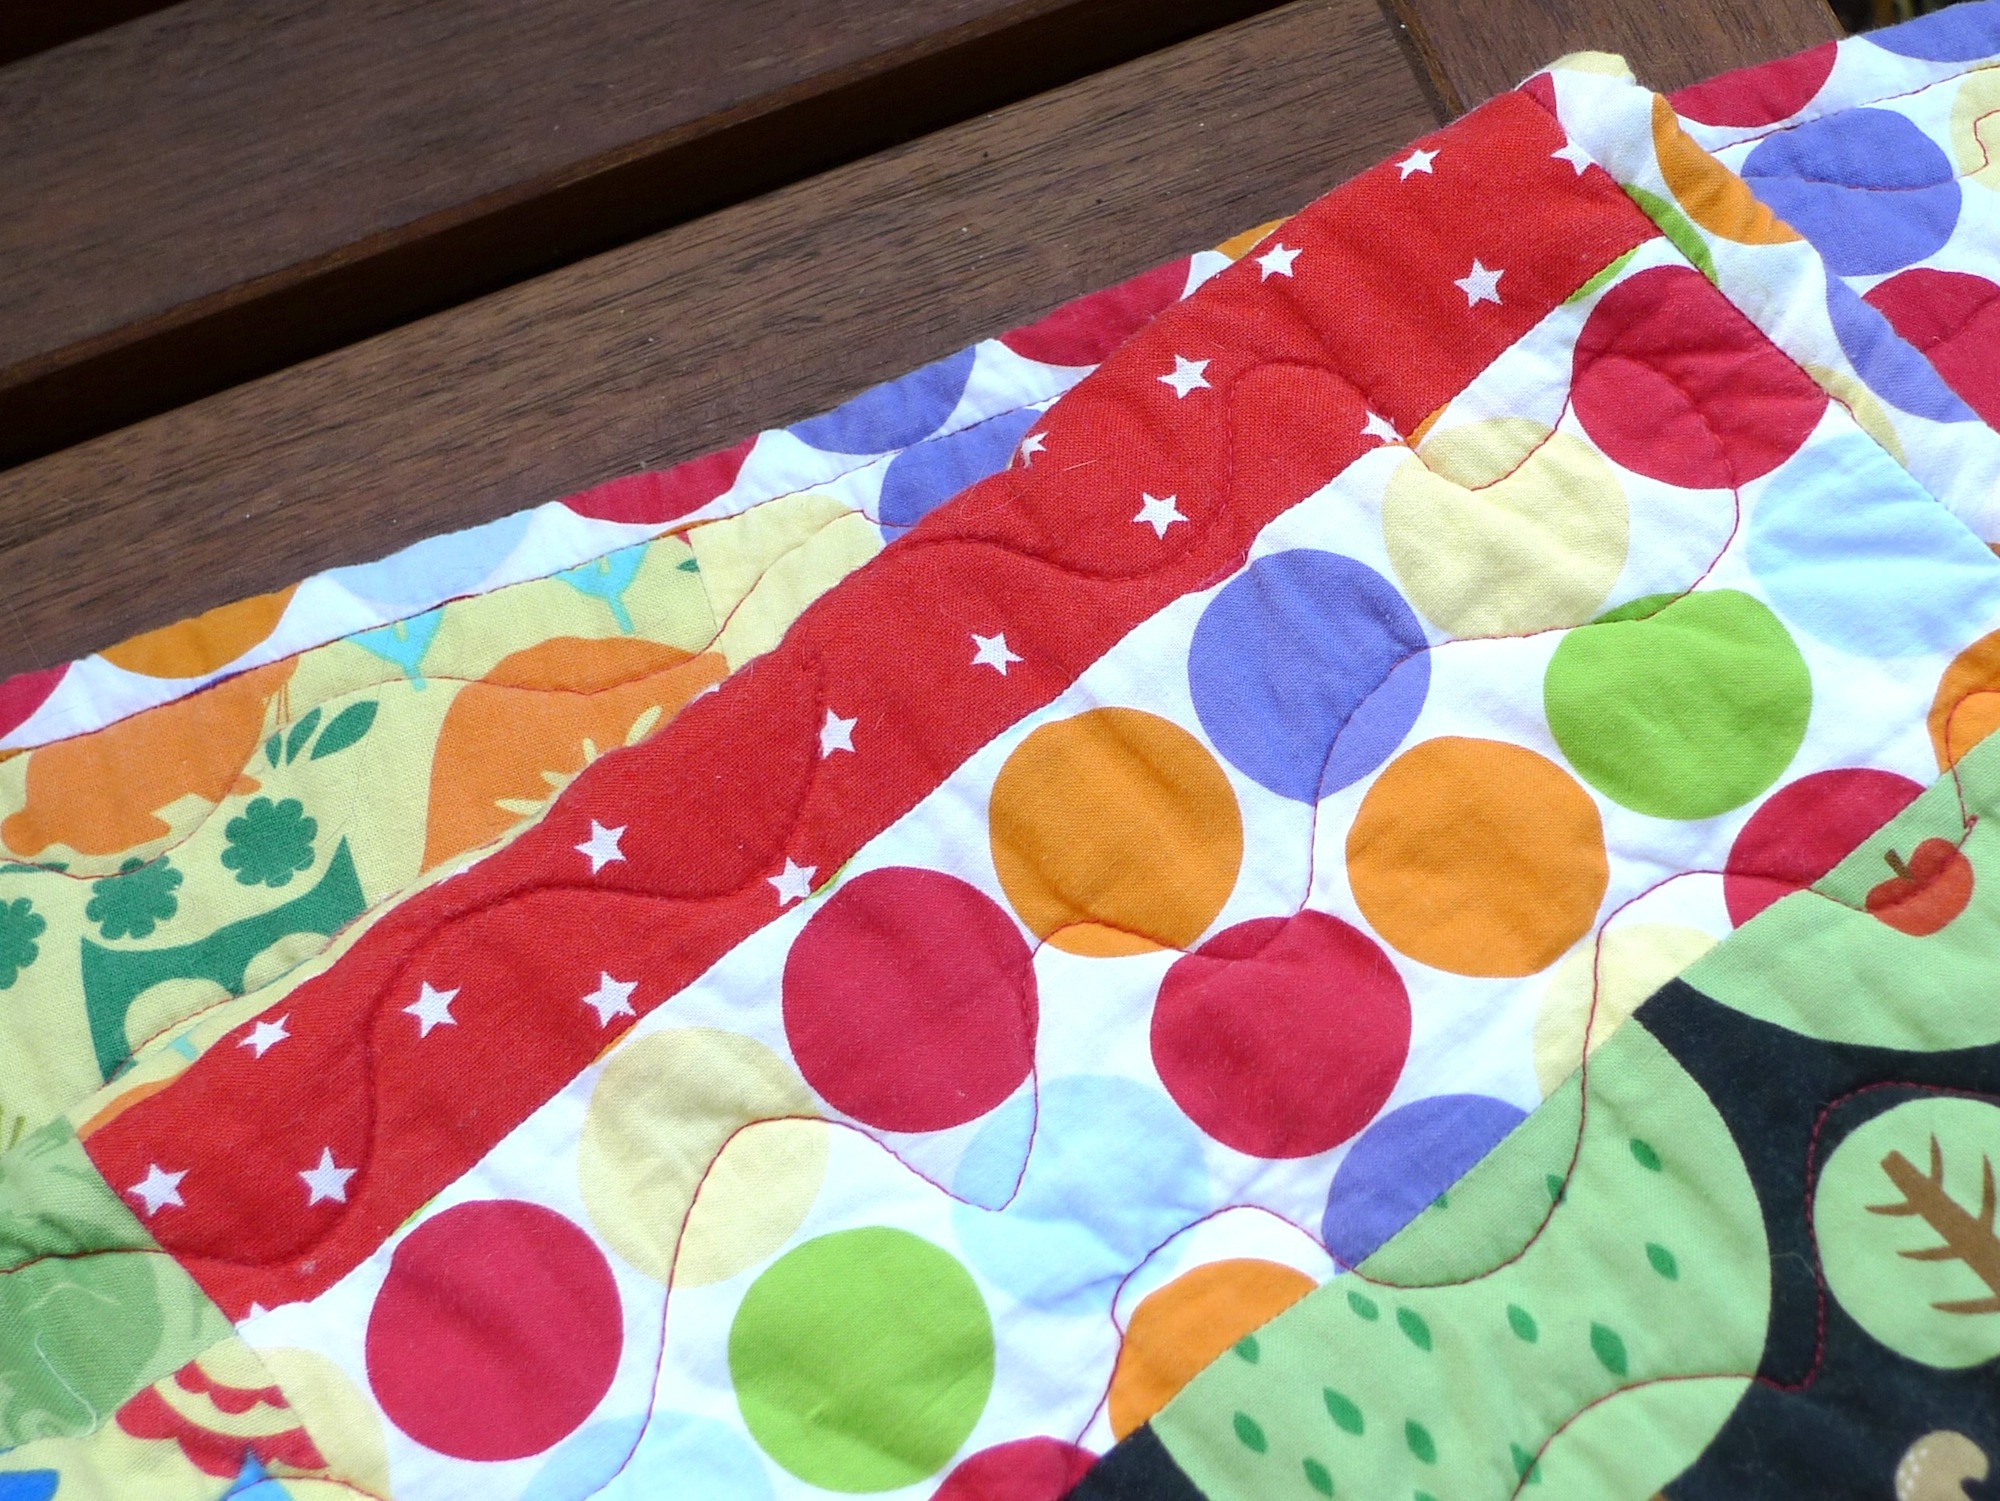
First free motion attempt - close-up (Sept 2013)
I still love it! It was my first attempt and the only way to improve is to practice. Since then I have used some plain cotton quilt "sandwiches" (scraps of batting between two pieces of Ikea's Bomull fabric is great) to practice and am slowly getting better. Once I get my Grace frame (November this year! Hooray!), it will be much easier to practice and I hope I will be able to master decent stippling in a short space of time.


